What Happens After Booking a PSA Online Appointment: Complete Process
Booking a Philippine Statistics Authority (PSA) appointment online is the first step toward obtaining important civil registry documents such as a birth certificate, marriage certificate, death certificate, or Certificate of No Marriage (CENOMAR). However, many applicants are unsure about what happens after they successfully reserve an appointment. Understanding each stage of the process from receiving your confirmation to collecting your requested document can help you avoid delays and ensure your visit goes as smoothly as possible.
Once you have completed your online appointment PSA, it is important to follow the instructions provided during the booking process. Reviewing your appointment details, preparing the required documents, and arriving at the selected PSA outlet on time will help you complete your transaction efficiently and reduce the likelihood of unnecessary complications.
Contents
- 1 Why Understanding the Post-Booking Process Matters
- 2 Step 1: Receive Your Appointment Confirmation
- 3 Step 2: Save Your Confirmation Details
- 4 Step 3: Review the Required Documents
- 5 Step 4: Double-Check Your Appointment Details
- 6 Step 5: Prepare the Processing Fee
- 7 Step 6: Plan Your Travel
- 8 Step 7: Arrive Before Your Appointment Time
- 9 Step 8: Check In at the PSA Office
- 10 Step 9: Document Verification
- 11 Step 10: Payment and Receipt Issuance
- 12 Common Mistakes After Booking an Appointment
- 13 Step 11: Application Processing
- 14 Step 12: Waiting for Document Release
- 15 What If You Miss Your Appointment?
- 16 Can You Reschedule Your Appointment?
- 17 Tips for a Smooth Appointment Day
- 18 What Happens After Receiving Your PSA Document?
- 19 Helpful Tips for Future PSA Transactions
- 20 Frequently Asked Questions
- 21 Final Thoughts
Why Understanding the Post-Booking Process Matters
Many first-time applicants believe that once an appointment has been booked, there is nothing else to prepare. In reality, several important steps take place before your scheduled visit.
Knowing what to expect allows you to:
- Prepare the correct documents.
- Avoid missing your appointment.
- Complete your transaction more quickly.
- Prevent delays caused by incomplete requirements.
- Reduce unnecessary travel and expenses.
- Feel more confident throughout the process.
Being well-prepared can make your PSA visit faster and less stressful.
Step 1: Receive Your Appointment Confirmation
After successfully completing your online booking, you will receive an appointment confirmation. This confirmation serves as proof that your reservation has been accepted and contains important information about your scheduled visit.
Your confirmation typically includes:
- Appointment reference number.
- Applicant’s name.
- Selected PSA outlet.
- Appointment date.
- Appointment time.
- Type of document requested.
- Additional instructions for your visit.
Review every detail carefully to ensure all information is correct.
Step 2: Save Your Confirmation Details
Do not rely solely on your email inbox or mobile device. Save your appointment confirmation in multiple ways so you can easily access it when needed.
Good practices include:
- Downloading the confirmation.
- Taking a screenshot.
- Printing a hard copy.
- Saving the reference number separately.
Having backup copies helps prevent problems if your phone battery runs out or internet access is unavailable on appointment day.
Step 3: Review the Required Documents
Before your appointment, verify which documents you need to bring.
Requirements may vary depending on the type of request, but applicants commonly prepare:
Valid Government-Issued Identification
Bring an original, valid government-issued ID that matches the information used during your appointment booking.
Appointment Confirmation
Carry your printed confirmation or a clear digital copy that can be presented during check-in.
Authorization Documents
If you are requesting documents on behalf of another individual, additional authorization papers and identification may be required.
Supporting Documents
Certain transactions may require extra supporting documents depending on the purpose of your request.
Preparing these requirements in advance helps avoid incomplete applications.
Step 4: Double-Check Your Appointment Details
Several days before your appointment, review all booking information again.
Confirm:
- Your appointment date.
- Appointment time.
- PSA outlet location.
- Applicant information.
- Document type requested.
If you notice any errors, address them as early as possible to avoid issues during your visit.
Step 5: Prepare the Processing Fee
Most PSA transactions require payment of an applicable processing fee.
To make payment easier:
- Prepare the correct amount whenever possible.
- Keep your payment receipt after completing the transaction.
- Follow the payment instructions provided by the PSA or authorized request channel.
Keeping your receipt safe is important until your request has been fully completed.
Step 6: Plan Your Travel
Planning your journey ahead of time helps ensure you arrive punctually.
Consider:
- Traffic conditions.
- Parking availability.
- Public transportation schedules.
- Travel distance.
- Weather conditions.
Leaving earlier than necessary provides extra time in case of unexpected delays.
Step 7: Arrive Before Your Appointment Time
Most applicants are encouraged to arrive approximately 15 to 30 minutes before their scheduled appointment.
Early arrival allows enough time for:
- Security checks.
- Identity verification.
- Queue management.
- Document review.
- Payment procedures.
Arriving late could affect your scheduled transaction, especially during busy periods.
Step 8: Check In at the PSA Office
Once you arrive at the selected PSA outlet, proceed to the designated reception or check-in area.
During check-in, staff may request:
- Your appointment confirmation.
- Valid identification.
- Supporting documents.
- Authorization papers, if applicable.
After verification, you will receive instructions regarding the next stage of the process.
Step 9: Document Verification
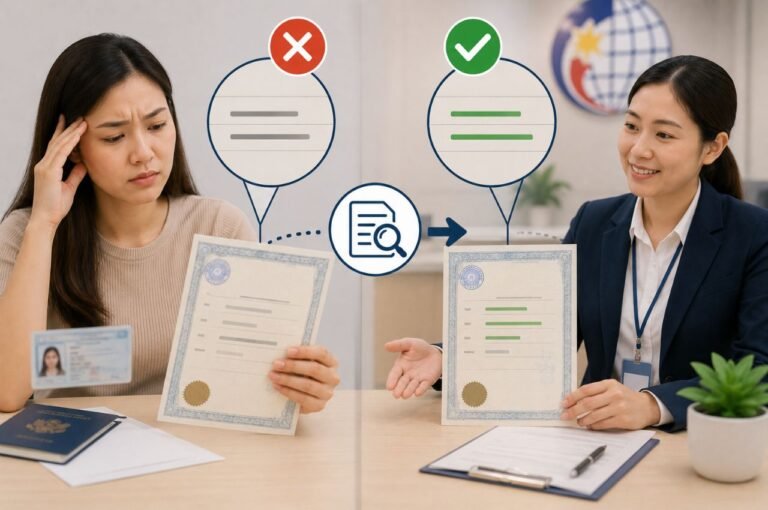
A PSA staff member will carefully review your submitted information before processing your request.
This verification helps confirm:
- Your identity.
- The accuracy of your personal information.
- The completeness of your supporting documents.
- Your eligibility to request the document.
If additional information is required, staff will explain the next steps.
Step 10: Payment and Receipt Issuance
Once your documents have been verified, you will proceed to the payment counter if payment has not already been completed.
After paying the required fee:
- Keep your official receipt.
- Verify the payment details.
- Store it safely until your transaction is finished.
Your receipt may be required during document release or for future reference.
Common Mistakes After Booking an Appointment
Many appointment problems can be avoided by paying attention to small details.
Some common mistakes include:
- Forgetting the appointment confirmation.
- Arriving late.
- Bringing expired identification.
- Providing incorrect personal information.
- Forgetting authorization documents.
- Visiting the wrong PSA outlet.
- Missing important appointment instructions.
Carefully reviewing your booking information before appointment day can help prevent these issues.
Step 11: Application Processing
After your documents have been verified and the applicable processing fee has been paid, your request enters the processing stage. During this step, PSA personnel review the information you provided and locate the corresponding civil registry record.
The length of processing may vary depending on several factors, including:
- The type of document requested.
- The completeness of your application.
- The availability of the record.
- The number of applicants being served that day.
- Whether additional verification is required.
Providing accurate information from the beginning helps reduce the possibility of delays during this stage.
Step 12: Waiting for Document Release
Once your request has been processed, you will either receive your document on the scheduled release date or be informed of the next steps, depending on the service you selected.
In some cases, documents may be released on the same day, while others may require additional processing time. If your request includes special circumstances or record verification, you may be advised to return on another date or wait for delivery if applicable.
Before leaving the office, carefully read any instructions provided by PSA personnel regarding document collection or follow-up procedures.
What If You Miss Your Appointment?

Unexpected situations can sometimes prevent applicants from attending their scheduled appointment. Missing your appointment does not always mean you cannot obtain your requested document, but you may need to follow the applicable appointment policies.
If you realize you cannot attend:
- Review the instructions included in your appointment confirmation.
- Check whether rescheduling is available for your appointment.
- Book a new appointment if necessary.
- Keep your confirmation details for future reference.
Avoid waiting until the last minute, as appointment slots may fill quickly during busy periods.
Can You Reschedule Your Appointment?
Depending on the appointment system and current PSA policies, some appointments may be eligible for rescheduling.
If rescheduling is available:
- Make the change as early as possible.
- Confirm your updated appointment details.
- Save the new confirmation message.
- Verify that your selected PSA outlet remains the same.
Making changes in advance helps ensure a smoother experience and reduces scheduling conflicts.
Tips for a Smooth Appointment Day
Being organized before your visit can make the entire process quicker and more comfortable.
Arrive Early
Aim to arrive at least 15–30 minutes before your scheduled time. This provides enough time for security screening, check-in, and document verification.
Organize Your Documents
Keep all required documents together in a folder, including:
- Appointment confirmation.
- Valid government-issued ID.
- Authorization letter (if applicable).
- Supporting documents.
- Payment receipt, if already issued.
Having everything readily available speeds up the verification process.
Follow Staff Instructions
PSA personnel are there to guide applicants through each stage of the process. Pay attention to announcements, queue numbers, and instructions regarding payment, document submission, and release.
Keep Your Receipt Safe
Your official receipt may be needed during document release or for future inquiries. Store it securely until your transaction has been fully completed.
What Happens After Receiving Your PSA Document?
Once your document has been released, take a few moments to review it before leaving the office.
Check that:
- Your full name is correct.
- Your date of birth matches official records.
- Your place of birth is accurate.
- Your parents’ names are correctly spelled.
- The document is free from visible damage.
If you notice any errors, inform the PSA staff immediately so they can advise you on the appropriate correction procedure.
Helpful Tips for Future PSA Transactions
Many applicants need additional PSA documents later for employment, education, immigration, or legal purposes. Keeping organized records now can save time in the future.
Consider these practices:
- Store your PSA documents in a waterproof folder.
- Keep digital copies of appointment confirmations for reference.
- Note your appointment reference number.
- Maintain valid government-issued identification.
- Review PSA requirements before every new application, as procedures may change over time.
Good preparation makes future transactions much easier.
Frequently Asked Questions
Do I need to print my appointment confirmation?
Many PSA outlets accept both printed and digital appointment confirmations, but bringing a printed copy is often a good backup in case your mobile device is unavailable.
Can I arrive earlier than my scheduled appointment?
Yes. Arriving 15 to 30 minutes early is generally recommended to allow enough time for check-in and document verification.
What should I do if I forget my valid ID?
Valid identification is typically required for identity verification. If you forget your ID, your transaction may be delayed or you may be asked to return with the necessary identification.
For eligible transactions, an authorized representative may be permitted to act on your behalf, provided they present the required authorization letter, valid identification, and any additional supporting documents required by the PSA.
How can I avoid delays during my appointment?
You can improve your experience by reviewing your appointment details in advance, bringing complete documentation, arriving on time, and carefully following all instructions provided by PSA personnel.
Final Thoughts
Booking a PSA online appointment is only the beginning of the document request process. After securing your schedule, taking the time to review your confirmation, prepare the necessary documents, verify your appointment details, and plan your visit can make a significant difference in how smoothly your transaction proceeds.
Whether you’re requesting a birth certificate, marriage certificate, death certificate, or CENOMAR, understanding each step from appointment confirmation and document verification to payment and release helps you approach your visit with confidence.
By arriving prepared, following official procedures, and keeping your records organized, you can minimize delays and complete your PSA transaction efficiently. A little preparation before your appointment goes a long way toward ensuring a faster, more convenient, and stress-free experience.